hexo支持Github Alerts
最近写博客时,我发现 GitHub Markdown 中提供的 Alerts 很有用,可以作为提示信息来展示。
它本质上是在 引用文本(Quoting text) 的基础上增加了一个特殊标记,从而在渲染时呈现出特殊的显示效果,对应的 Markdown 代码如下:
1 | > [!NOTE] |
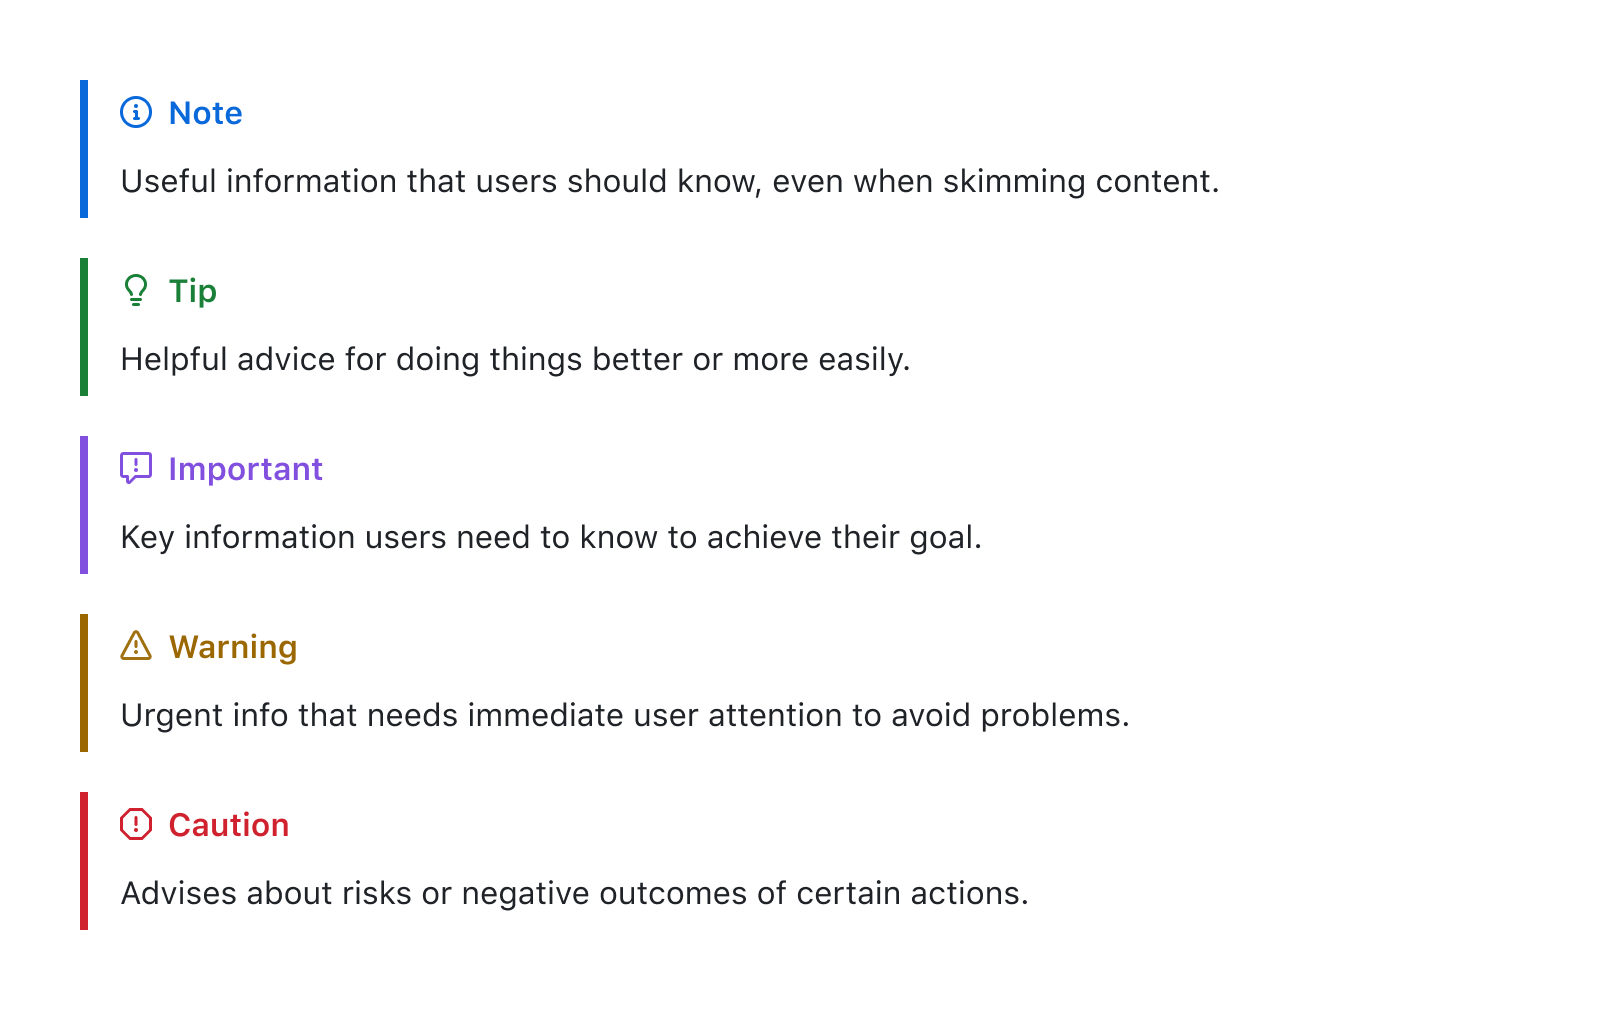
渲染结果如下:
本来我以为这是 gfm(GitHub Flavored Markdown Spec)规范的一部分,后来才发现这其实是 GitHub 单独实现的功能,Hexo 默认并不支持。不过搜了一下,发现实现起来并不复杂,于是就用这篇博客记录一下实现过程。
Alerts & Quoting
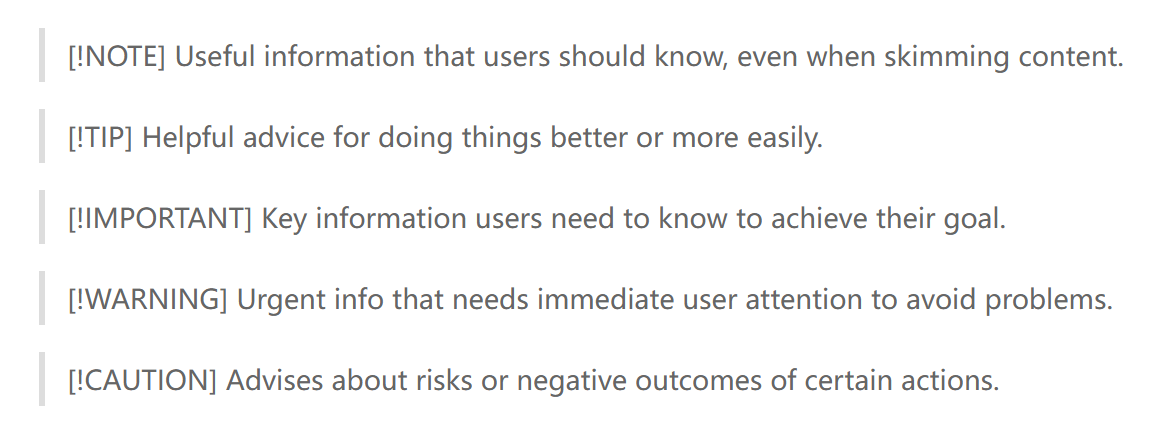
在 Hexo 中,如果直接添加 Alerts 的 Markdown 代码(使用的 Pandoc 版本为 3.0.1),渲染效果如下:
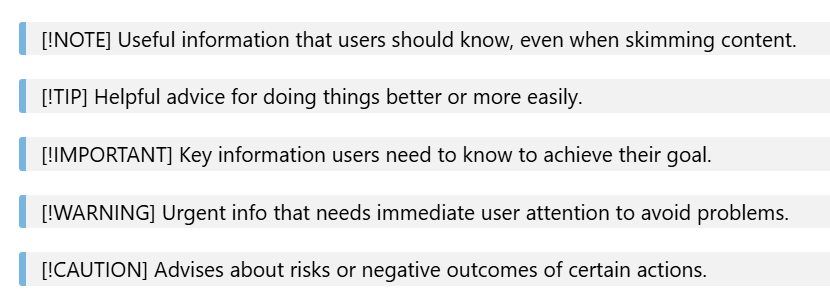
在 VS Code 中渲染时,情况也类似:
但是 Typora 编辑器默认支持这一语法([!NOTE] 说明这个
Alert 仍然可编辑),渲染效果如下:
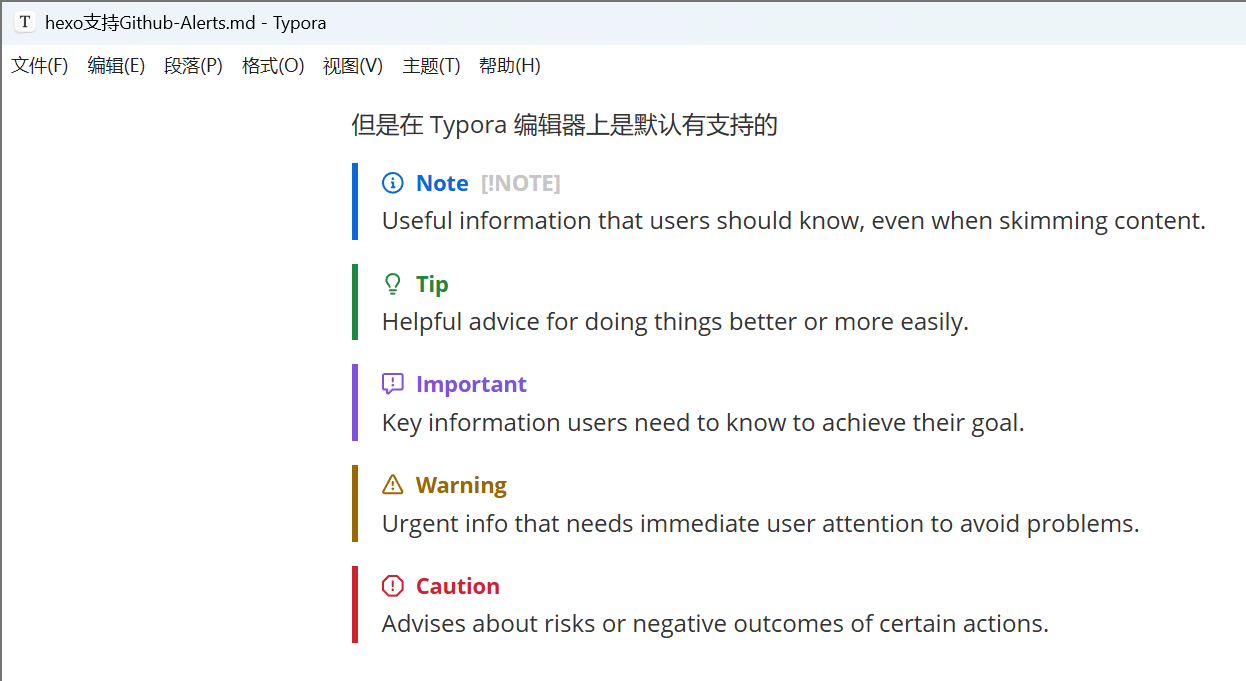
(正是因为 Typora 支持这种展示效果,才让我在编写文档时不自觉地加上了这个 Alert。结果发现 Hexo 和 VS Code 都不支持 😓,出于强迫症就把这个功能给它补上了,不然看着实在难受。)
HTML 差异
既然想要支持类似的展示效果,首先要分析 Pandoc 转换得到的 HTML 代码与 GitHub 上展示的 HTML 代码之间有什么差异:
原始 markdown 代码
1 | > [!NOTE] |
渲染效果(原始文章):

github alerts
1 | <div class="ghd-alert ghd-alert-accent" data-container="alert"> |
pandoc generated(pandoc version 3.0.1)
1 | <blockquote> |
此时 Pandoc 还不支持对 Alerts 的解析,仍然会将其按普通块引用来处理。
而根据 Pandoc 最新版的
Markdown 文档,只需要在转换时启用 alerts
扩展,就可以将其解析成上面 GitHub Alerts 的结构,转换命令如下(Pandoc
version 3.8.0):
1 | pandoc -f gfm+alerts -t html5 -o test.html test.md |
生成的 html 如下所示:
pandoc generated (pandoc version 3.8.0)
1 | <div class="note"> |
它会将整个 Alert 的内容放进一个 div 容器中,并将
[!NOTE] 这类类型标记转换为外层 div 容器的
class,同时单独为标题创建一个 div 容器,并将其 class 设置为
title。
对比 GitHub 版的 HTML,可以看到两个主要差异,都体现在 title 部分:
外层容器不同。GitHub 版 title 的外层容器是
<p>,而 Pandoc 版外层容器是<div>。这是因为在 Pandoc 的元素设计中,只有部分标签可以设置 class 属性,默认的
Para元素并不支持附加 class 信息。好在<div>和<p>在这里的使用差异并不大,而且 Pandoc 版内部依然用<p>做了一层包裹。Pandoc 版 缺少 Alert 的 SVG 图标。
第一个差异和 Pandoc 本身的设计有关,基本无法避免;但第二点可以结合
Pandoc 的 Lua filter 来处理。只要在转换过程中检测到
<div class="title"><p></p></div>
这一类结构,就可以在内部的 <p> 标签里插入 SVG
图标。
代码实现如下(完整代码在这里):
1 | local function Div(div) |
其中:
get_alert_type函数检查当前<div>标签的 class,判断是否有类似<div class="note">的类型声明,并根据 Alert 的类型返回对应类别的图标(原始的 SVG 代码);get_title_element函数遍历<div>标签下的子元素,返回包含<div class="title">的那个元素;capitalize_first函数将单词的首字母大写,例如note转换为Note。
找到 Alert 块的根容器以及对应的 Alert
类型之后,就可以直接进行修改,插入 SVG 图标。这里必须使用
pandoc.RawInline 进行插入,否则 Pandoc 会把 SVG 解析成
base64 图片。之后再补上相应的 class 信息即可,具体如何使用见下一节。
应用 lua filter 后转换得到的 html 如下:
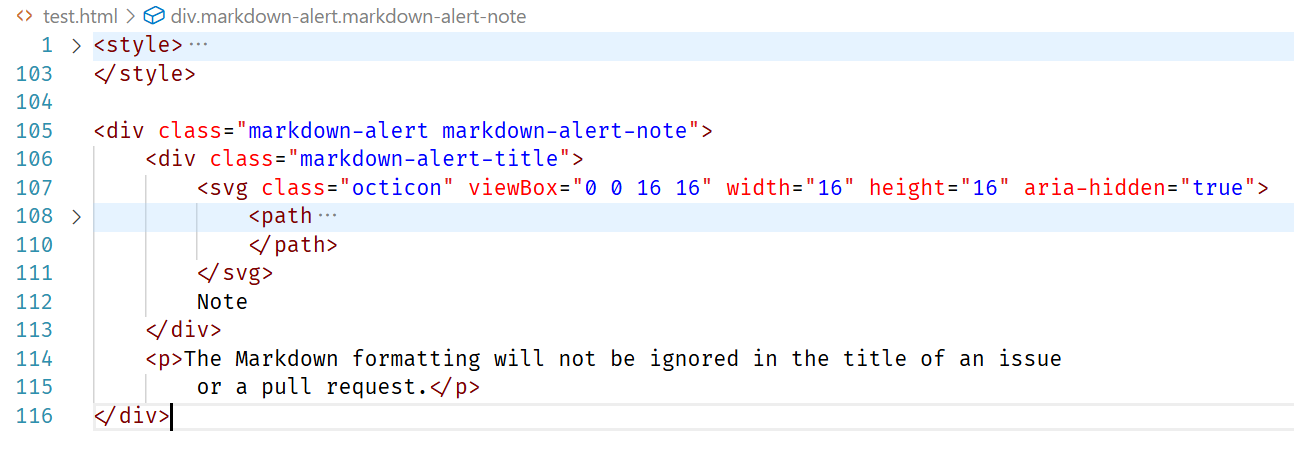
pandoc generated (pandoc version 3.8.0 with lua-filter)
1 | <div class="markdown-alert markdown-alert-note"> |
此时,Pandoc 生成的 HTML 与 GitHub 版之间就只剩下样式以及 title
外层容器类型的差异了,而 <div> 和
<p>
的区别可以暂时忽略,因此接下来只需要处理样式问题。
添加样式
原本我想直接照搬 GitHub 版的 Alert 样式,但里面似乎混杂了不少其他样式,而且我对 CSS 也不算熟,还是先看看有没有现成的库可以直接复用。
幸好,remark-github-blockquote-alert 可以满足我们的需求(好耶!💃)。
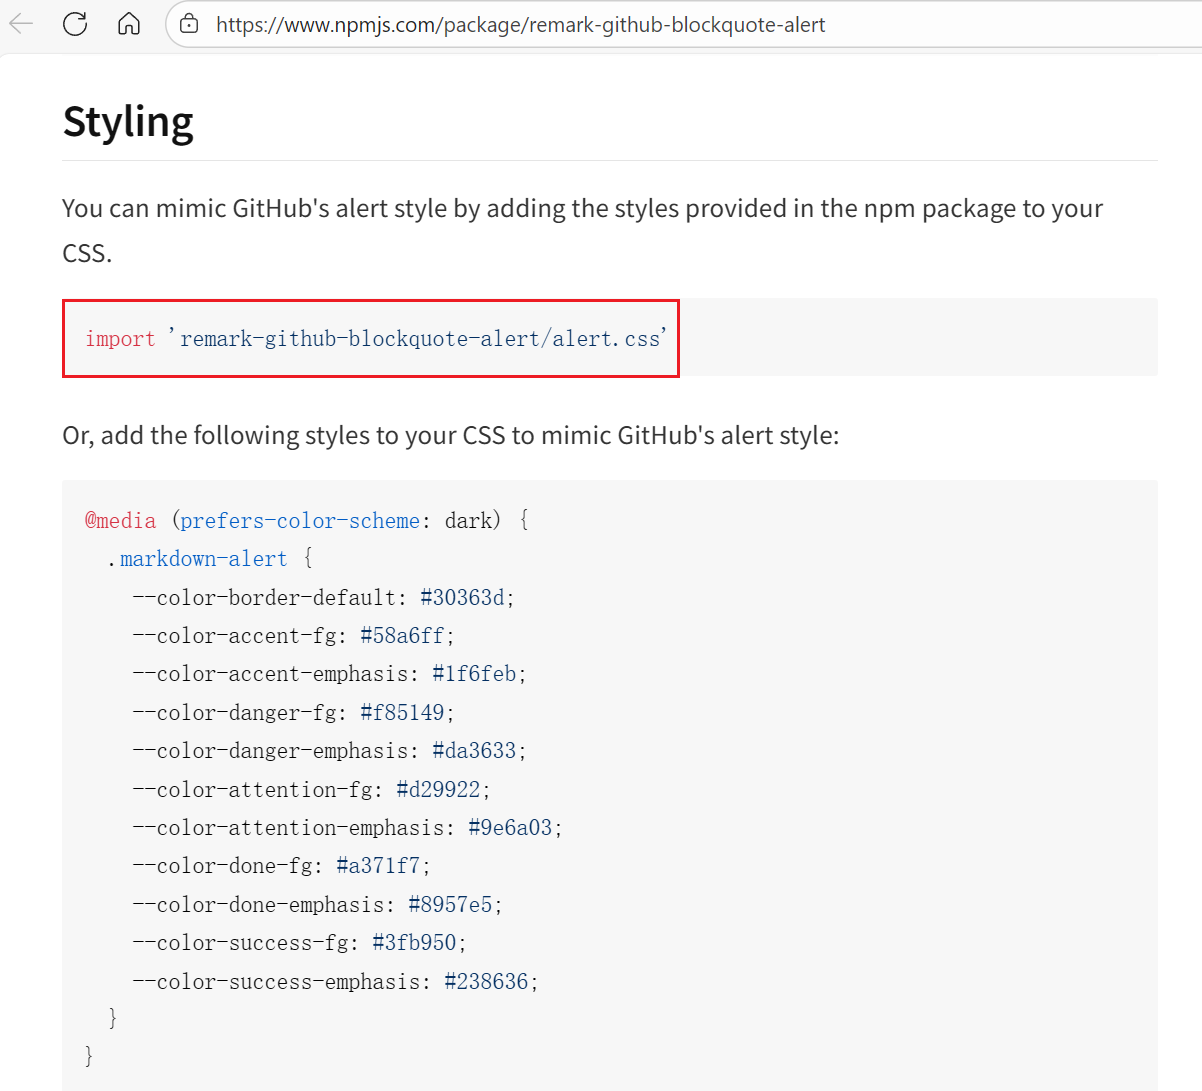
只需要在加载样式时一并引入
remark-github-blockquote-alert/alert.css,再补上指定的
class 即可。
有两处需要添加:
- alert 最外层容器需要设置
markdown-alert markdown-alert-<alert-type>两个类; - title 的最外层容器需要设置
markdown-alert-title类。
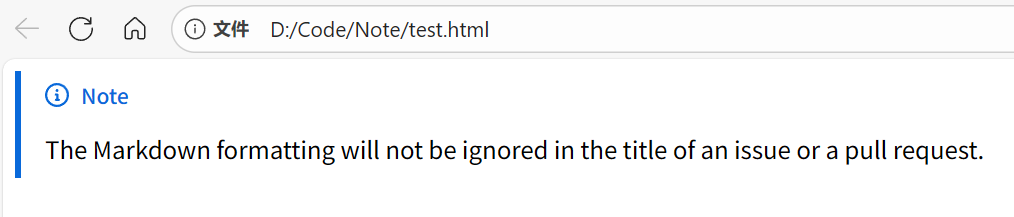
先手动把 CSS 内容插入到 Pandoc 生成的 HTML 文件中,检查一下渲染效果。
pandoc generated with css (pandoc version 3.8.0 with lua-filter)
(代码太长直接贴图了,style 块中就是库提供的 css 内容)
渲染效果如下:
pandoc generated with css
github alerts
可以看到字体上还有一点细微差异,但整体已经足够满足需求了。(<div>
和 <p> 的差异,确实可以先不管了ね😀)
Hexo 集成
最后一步,只需要让 Hexo 在渲染时自动加载这个 CSS
文件,就可以在网页上展示 Alert 了。这一步需要修改 Next 的配置文件
_config.next.yml,在 custom_file_path
中启用样式文件配置:
1 | diff --git a/_config.next.yml b/_config.next.yml |
同时确保 source/_data/styles.styl
文件存在即可。为了避免手动拷贝,我又写了一个简单的 Hexo
插件来自动完成复制,代码如下:
hexo-copy-alert-css.js
1 | ; |
这样一来,只要在 package.json 中安装了
remark-github-blockquote-alert
依赖,就可以直接拷贝包里提供的
alert.css,确保使用的是最新样式。(虽然感觉它大概率不会频繁变动,但有明确来源总归更安心一些。)
最后,直接在 Markdown 中写一段 Alert 内容,检查配置是否生效。
Useful information that users should know, even when skimming content.
Helpful advice for doing things better or more easily.
Key information users need to know to achieve their goal.
Urgent info that needs immediate user attention to avoid problems.
Advises about risks or negative outcomes of certain actions.
如果能看到和文章开头一致的渲染效果,就说明配置成功了(😎)。