Conan使用
Conan 作为一个 C++
包管理工具,相对于之前介绍的 CMake FetchContent 或者 ExternalProject
方式添加第三方依赖会更加简单,但是凡是碰上了
C++,都简单不到哪去,学习成本还是有一点的,就用一篇笔记介绍一下
Conan 的基本使用。
安装 Conan
由于我们后面会大量使用 conanfile.py,且也可以借助 Python 插件实现
conanfile.py 的代码补全,直接使用 Python 库的方式安装
Conan,安装命令如下:
1 | python -m pip install conan |
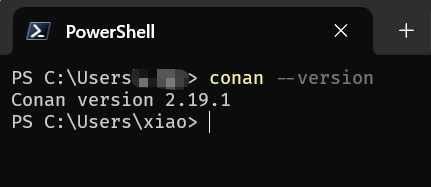
安装之后例行检查一下版本
1 | conan --version |
Conan 模板项目
通过 conan new 命令可以快速创建 C++ 模板项目。
对于基于 CMake 的 C++ 项目而言,可以使用 cmake_exe 和
cmake_lib,Conan 也支持自行指定代码模板。在本文最后会结合
VS Code 提供一个添加 VS Code 支持的 Conan CMake 模板。
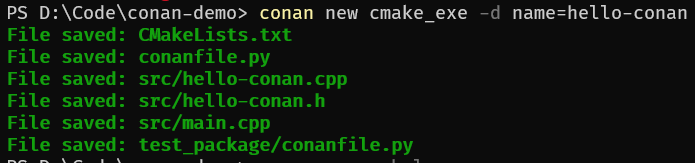
1 | conan new cmake_exe -d name=hello-conan |
执行命令后,其会自动创建好一些必要的文件,如下图所示:
其目录结构如下所示:
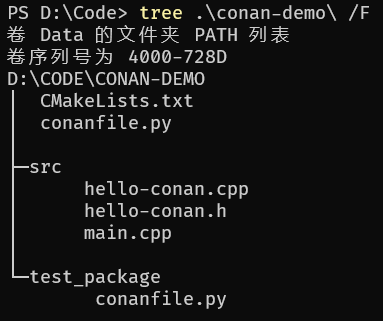
C++ 源码和头文件放在 src 目录下,同时还生成了一个
test_package 目录,用于测试当前包,暂时用不上。
Hello World
依次输入以下命令,完成样例项目的编译和运行
1 | conan profile detect --force |
简单介绍一下每一步在做什么
step1(代码行1):生成编译工具链配置
step2(代码行2):下载并安装第三方库依赖
step3(代码行3~4):查看当前 CMake configure 预设配置,并进行 configure,生成当前项目的编译配置
step4(代码行5~6):查看当前 CMake 的编译预设配置,并进行编译
step5(代码行7):执行 CMake 安装,将可执行文件安装到
install 目录
step6(代码行8):执行程序
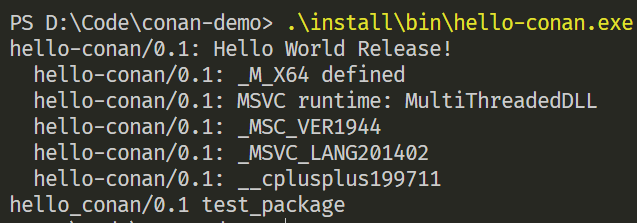
程序执行输出如下:
VS Code 支持
目前我们都是使用命令行进行简单操作,但真正进行开发时还需要 IDE 的代码提示和调试功能。下面介绍如何基于 VS Code 配置一个支持 Conan 和 CMake 的 C++ 开发环境。
安装 C++ 开发插件
- C/C++ Extension Pack
- CMake Tools
- clangd
- CodeLLDB
添加自定义 Tasks
如何在 VS Code 中添加自定义 task,可以参考 tasks 使用文档
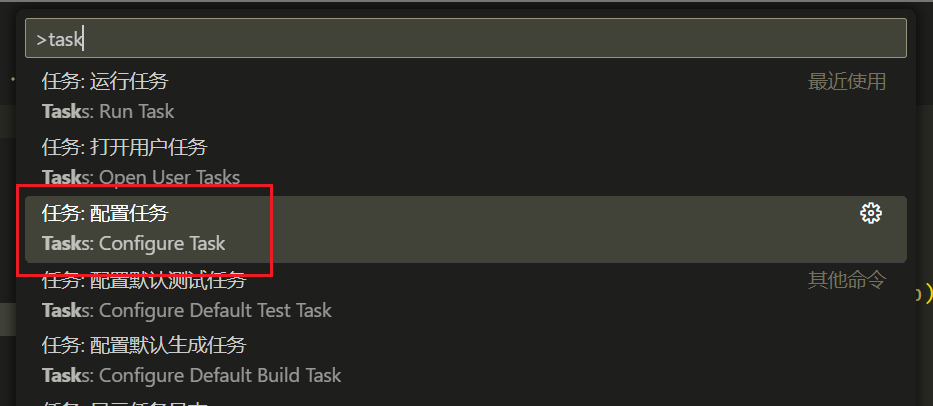
通过快捷键 Ctrl+Shift+P
打开配置面板,输入 task,选择
"任务:配置任务"
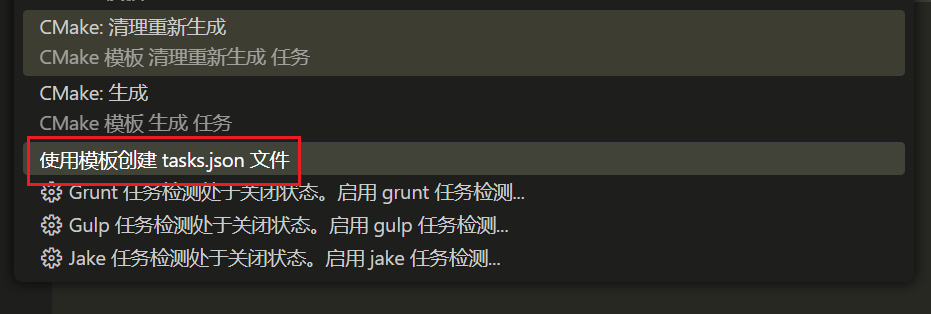
然后点击 "使用模板创建 tasks.json 文件",这样就会自动创建一个可用的 tasks.json。
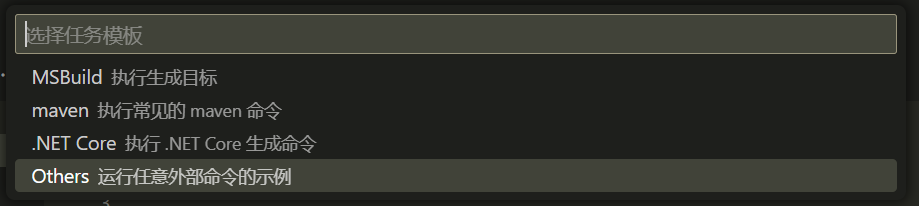
之后选择 tasks 的模板,这里直接选择 “Others 运行任意外部命令的示例”
创建好的模板 tasks.json 内容如下
如果找不到创建 tasks.json 的入口,也可以直接手动创建
.vscode/tasks.json 文件,并填入下列内容
1 | { |
根据前一节的操作步骤,可以将编译到运行的过程分为3个子步骤:
- Conan 准备
conan profile detectconan install
- CMake 配置和编译
cmake --preset <selected-configure-preset>cmake --build --preset <selected-build-preset>cmake --install
- 程序运行
.\hello-conan
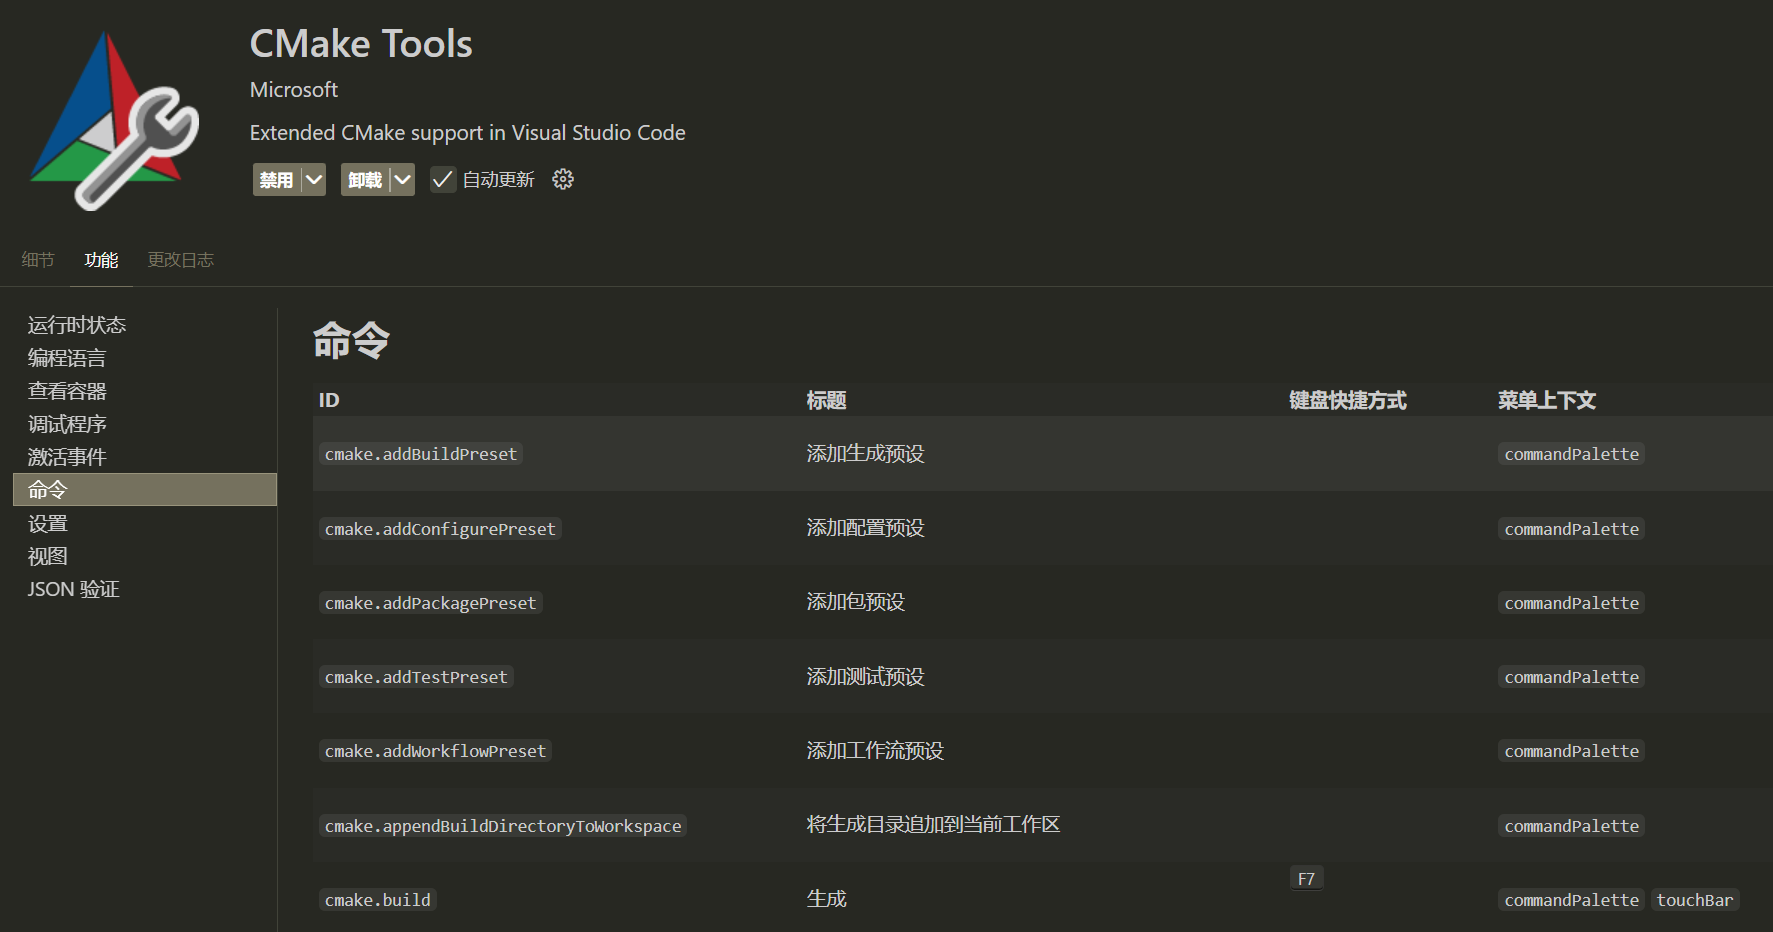
在 VS Code 中已经集成了 CMake 的插件,可以直接读取 Conan 生成好的 CMakePresets.json 进行配置和编译,那么我们只需要在 Tasks 中编写 Conan 的相关操作即可。对于 CMake 相关操作直接通过 Ctrl+Shift+P 调出命令面板执行即可,如下图所示:
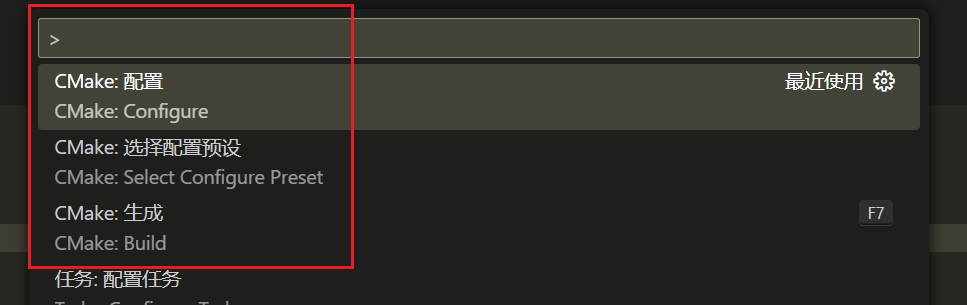
其中
CMake: 选择配置预设对应命令行cmake --list-presetsCMake: 配置就对应命令行cmake . --preset <selected-configure-preset>CMake: 生成就对应命令行cmake --build --preset <selected-build-preset>
封装 Conan 工具链检查和依赖安装的 tasks.json 内容如下:
1 | { |
我们定义了 6 个 task:
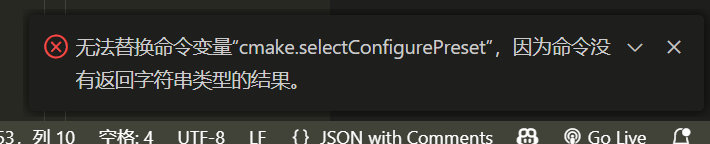
Conan: Detect Profile:对应conan profile detect --forceConan: Install Dependency [Debug]:对应conan install(安装 Debug 编译模式下的依赖)Conan: Install Dependency [Release]:对应conan install(安装 Release 编译模式下的依赖)CMake: Select Configure Preset:通过${command:cmake.selectConfigurePreset}执行 CMake 插件提供的命令CMake: Configure:同上,通过${command:cmake.configure}执行 CMake 插件提供的命令Note这里
${command:cmake.configure}会执行插件提供的命令,并使用命令输出进行字符串替换,中间可能会报错,因为我们的目标是在 tasks 中执行 VS Code 的一些命令(有点邪道?),具体可以参考 VS Code 对变量替换的说明文档![]()
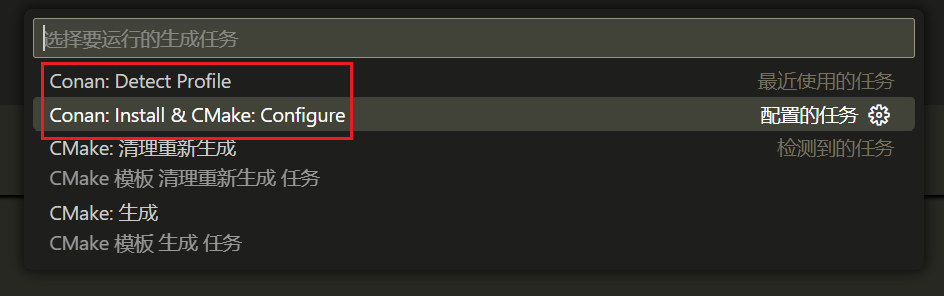
Conan: Install & CMake: Configure,同时安装 Debug 和 Release 模式下的依赖,并选择预设配置进行生成
由于我们设置 task 的 group 为 build,可以直接通过快捷键
Ctrl+Shift+B
快速调用(调用生成任务),如下所示
这样,使用 VS Code 进行开发时,只需要以下 3 个步骤,且都可以通过 VS Code 的 task 完成:
- [可选] Conan 检测工具链
- [首次执行/更新三方库时] 安装 Debug / Release 模式的三方库依赖
- 调用 CMake 配置和编译
小插曲
在 tasks.json 中配置 Conan 命令时,想通过 Conan conf 的
tools.cmake.cmaketoolchain:extra_variables 选项新增
CMAKE_EXPORT_COMPILE_COMMANDS(不要问我为什么不在
conanfile.py 中添加😎),让 CMake 自动导出
compile_commands.json。
但是发现怎么配置也配不好,搞了半天发现是命令行命令对引号的转义导致的,需要写成这样的形式:
1 | { |
查了conan
cmake conf 文档 后发现,conan 对
tools.cmake.cmaketoolchain:extra_variables
要求输入一个字典字符串(即可以通过 eval()
函数进行解析的字符串),即输入的字符串必须是
{"<key>":"<value>"} 这种形式,且 "
是必须的,为了保证在输入是 "
不被字符串解析过程中吞掉(命令行传递参数时会对引号做处理),就需要额外添加
\ 进行转义,也就是写成如下形式
{\"<key>\":\"<value>\"},而将这个字符串写入
json 中,还需要进行一次转义,就变成了最终 tasks.json 上的那种形式
1 | {\\\"<key>\\\":\\\"<value>\\\"} |
这种丑陋的形式(在 C++ 中写正则表达式,也需要多次转义,C++ 字符串本身的转义和正则表达式中的转义会叠加)。
不过最后发现,在命令行里指定
tools.cmake.cmaketoolchain:extra_variables
无法实现跨平台,最后只能在 conanfile.py
中添加,里面也有点坑。
默认的 conanfile.py 如下
1 | class testRecipe(ConanFile): |
如果需要在 conanfile.py 中指定 CMake 的
generator,一定要同时修改 layout 和
generate 两个函数,否则在 layout 获得的 build_dir
是错误的,导致 Conan 自动创建的 build 目录有问题,修改情况如下:
1 | --- "a/.\\conanfile.py" |
配置 clangd
为了实现多平台统一的开发体验,使用 clangd
进行代码补全,同样,还是需要一系列的配置,这一次主要修改
.vscode/settings.json,相关配置如下:
1 | { |
其中比较关键的配置项有 4 项:
C_Cpp.intelliSenseEngine:禁用 C/C++ 插件自带的代码提示引擎其会和 clangd 冲突,一般在安装 clangd 插件时就会自动提示禁用了
cmake.exportCompileCommandsFile:设置 cmake 插件在 configure 时导出compile_commands.json这一步实际上是在 cmake configure 的时候添加
-DCMAKE_EXPORT_COMPILE_COMMANDS选项,因为 clangd 依赖 compile_commands.json 进行代码补全![]()
cmake.copyCompileCommandsFile:将 compile_commands.json 拷贝到指定位置因为我们目前使用的是 Ninja 进行编译,其是单配置模式,即 Debug 模式和 Release 模式的 compile_commands.json 会输出到不同的目录下,通过该选项,可以将不同编译配置下的 compile_commands.json 输出到一个固定位置,便于 clangd 读取
Tip单配置模式:Debug 和 Release 需要单独的 CMake Configure,例如 Make 和 Ninja
多配置模式:Debug 和 Release 可以共用同一套 CMake Configure,例如 Visual Studio 的 Solution
具体可以参考 CMake 官方文档中对于编译配置的说明
clangd.arguments:配置 clangd 如何进行代码补全

具体有哪些命令行选项可以通过 clangd --help
查看,这里配置的是个人觉得比较好用的一些配置,其中比较关键的一个是
--compile-commands-dir=${workspaceFolder}/build,该配置项指定了
compile_commands.json
所在目录,这一个需要与前一个配置的路径相对应,否则 clangd
将无法正确工作
editor.tabSize 和 C_Cpp.formatting
是代码格式化的配置,可根据个人喜好进行配置
填写好相关配置后,可以重启 clangd(同样在命令面板中进行操作)
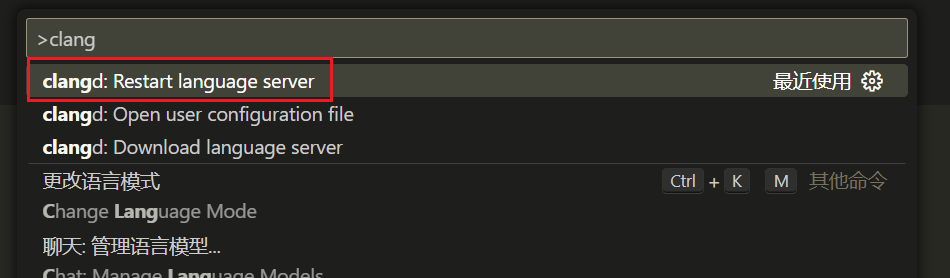
并在输出中观察 clangd 是否正常工作
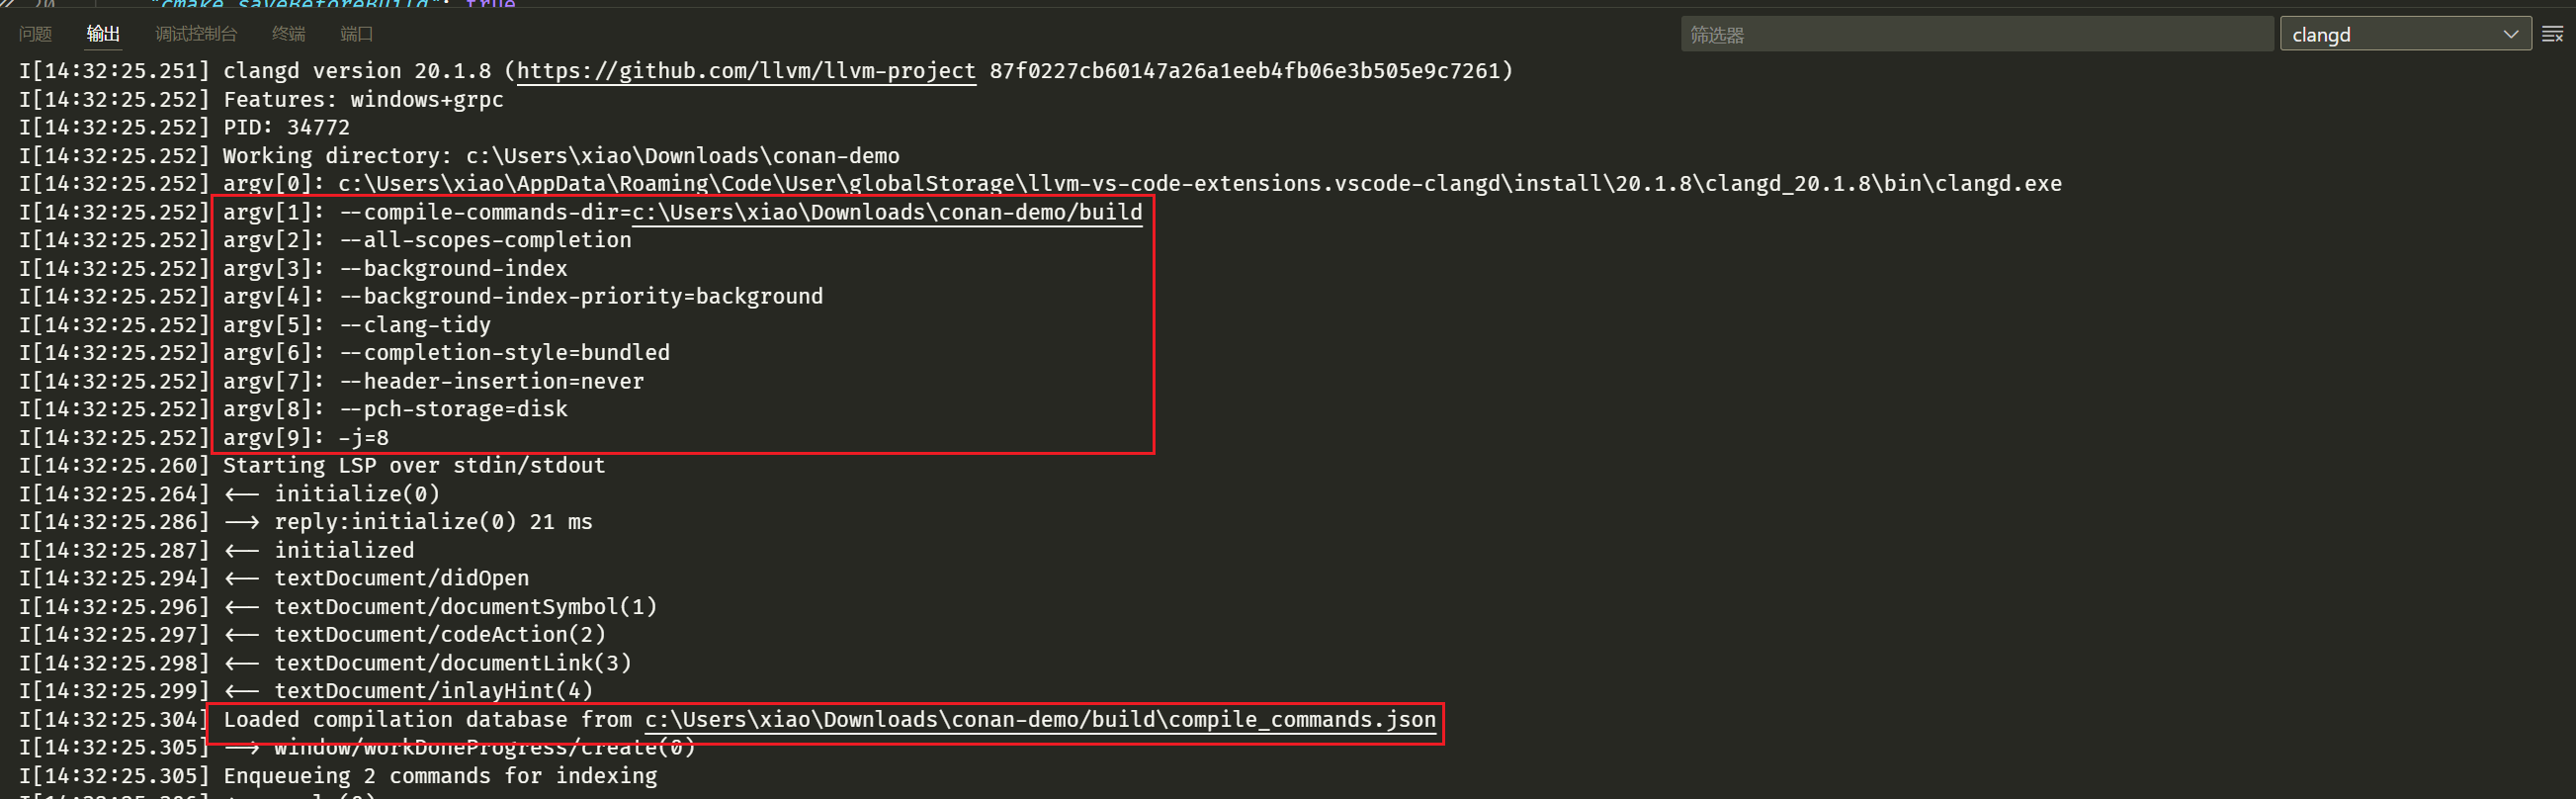
如果看到 clangd 的相关日志中包含刚才配置好的命令行选项,并成功加载了 compile_commands.json 文件,则说明已经配置完成。
配置调试
还有最后一步,代码调试(已经感觉有点累了😫,VS Code 的 C++
开发环境属实有点难配了)。幸好,这一步只需要简单集成一下 CMake
的调用命令即可,创建
.vscode/launch.json,并填写下列内容。
1 | { |
这里我们使用了 ${command:cmake.launchTargetPath}
来获取当前配置的启动程序,不用为每一个可执行程序都显式配置相应的运行项,而且通过这个命令进行调试还可以在启动之前自动完成编译。
如果需要使用其他命令,可以在插件的详情面板查询插件提供的所有命令(不过当我们需要指定额外的运行参数时,还是直接创建新的 launch target 比较好)
添加依赖
到这里,我们就可以开始修改代码(可算是进入正题了😓),添加一些想要的依赖了(调包侠
yes!),简单点,使用 Eigen 和 spdlog 做一个简单的矩阵运算吧。
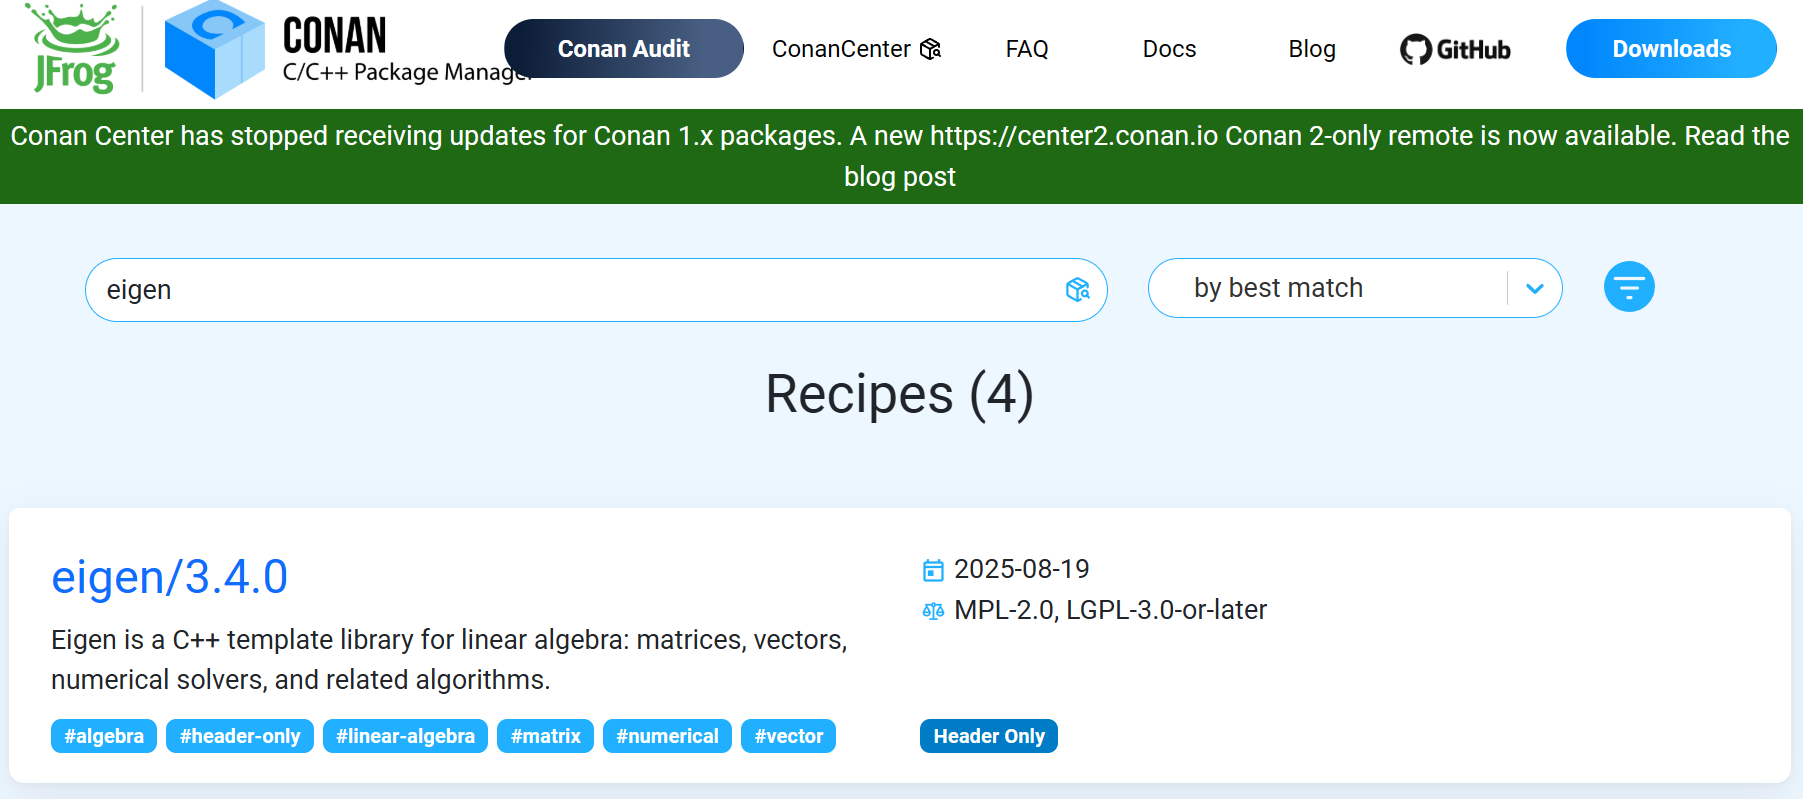
首先在 Conan Center 网站上查询需要使用包的版本
点击详情后,可以进一步查看如何在 conanfile.py
中引入这个包
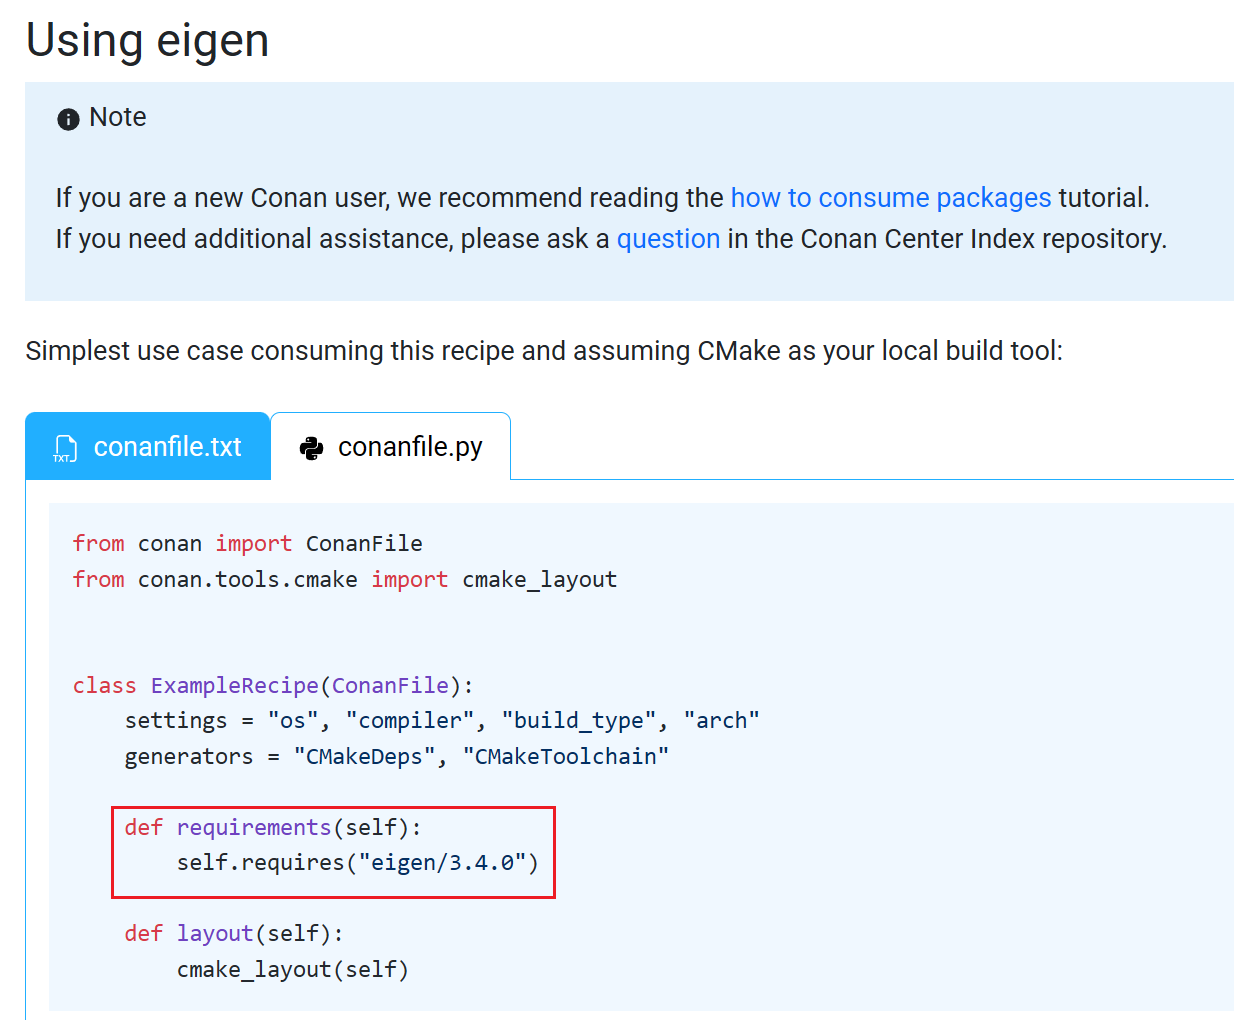
只需要修改 conanfile.py,创建 requirements
函数,并填写依赖即可,对于 spdlog 也是如此。
1 | def requirements(self): |
引入依赖后,需要重新调用一遍
conan install,会自动下载对应的包。
使用时,需要更改 CMakeLists.txt,通过 cmake 的
find_package
找到对应的包,将其链接到可执行程序上即可,在指引中也同样有写
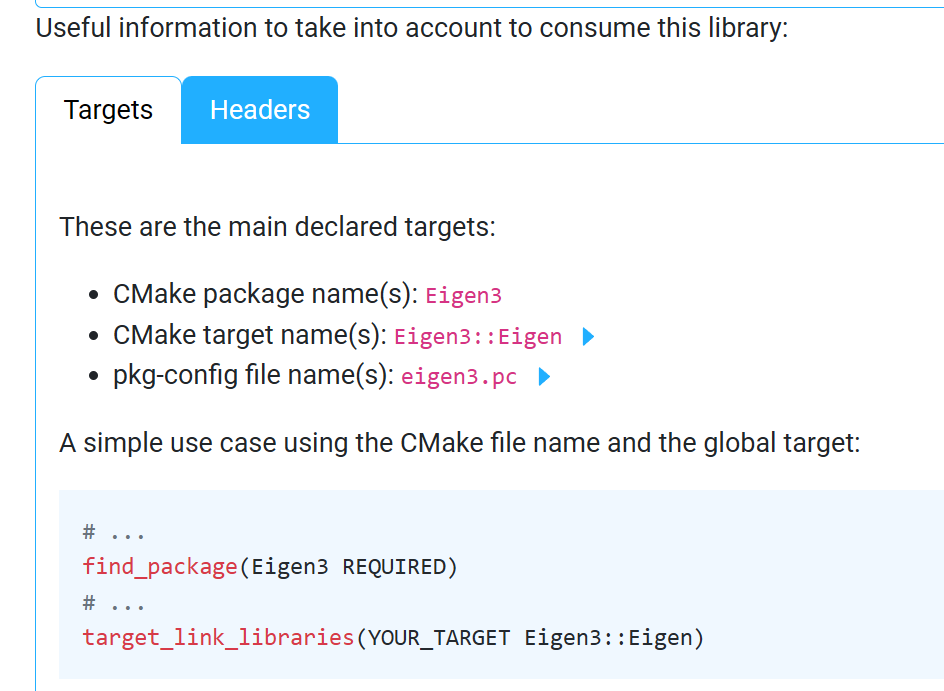
1 | find_package(Eigen3 REQUIRED) |
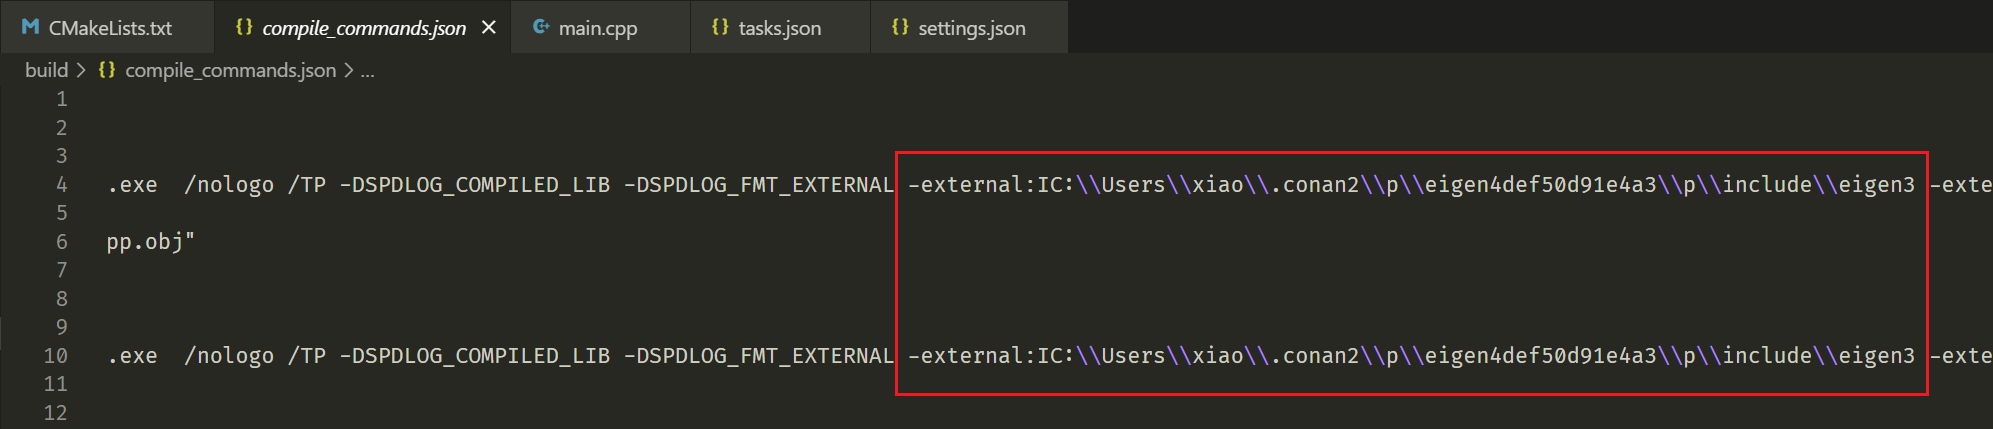
此时重新 configure 后,compile_commands.json 中包含了我们新引入了第三方依赖,就可以通过 clangd 进行代码补全了
自定义 Conan 项目模板
从 VS Code 的配置过程可以发现,VS Code 作为一个文本编辑器,进行 C++ 开发需要各种各样的配置,每次创建新项目都十分繁琐。为了简化这个配置过程,我们可以借助 Conan 的模板项目,这样就可以减少重复操作,更加专注于代码本身(想起了前端开发中各种代码模板生成工具)。
参考 Conan 创建项目模板文档
Conan 内置了一系列模板,这一部分是直接写在 Conan 源码里的(具体路径为
<Python安装目录>\Lib\site-packages\conaninternal\api\new)。
以 cmake_exe 为例,其模板目录结构如下(没错,文件名也是可以是模板形式的,便于使用 Jinja2 进行字符串替换)。
如果需要新增模板,只需要拷贝整个模板目录文件夹至
.conan2/templates/command/new
目录下,然后使用模板目录的名称进行创建即可。
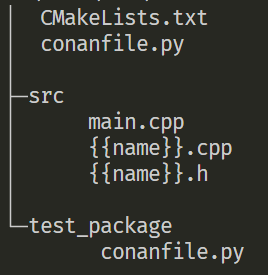
例如我们创建了一个包含 VS Code 相关配置的 cmake_exe 模板,命名为
vscode_cmake_exe,其目录结构如下。

使用下面命令就可以导入模板并使用了
1 | # step 1. 创建项目文件夹并切换到该目录 |
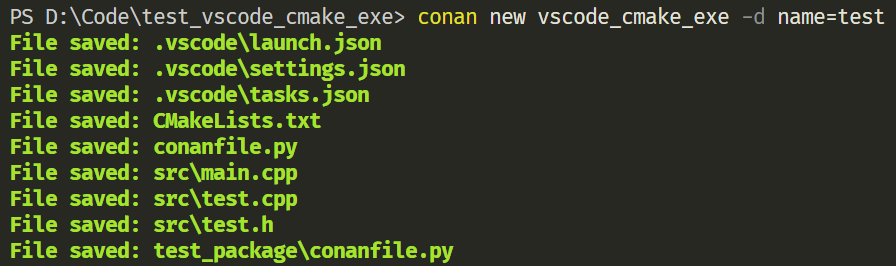
可以看到文件名中的 {{name}} 被替换成了指定的
test
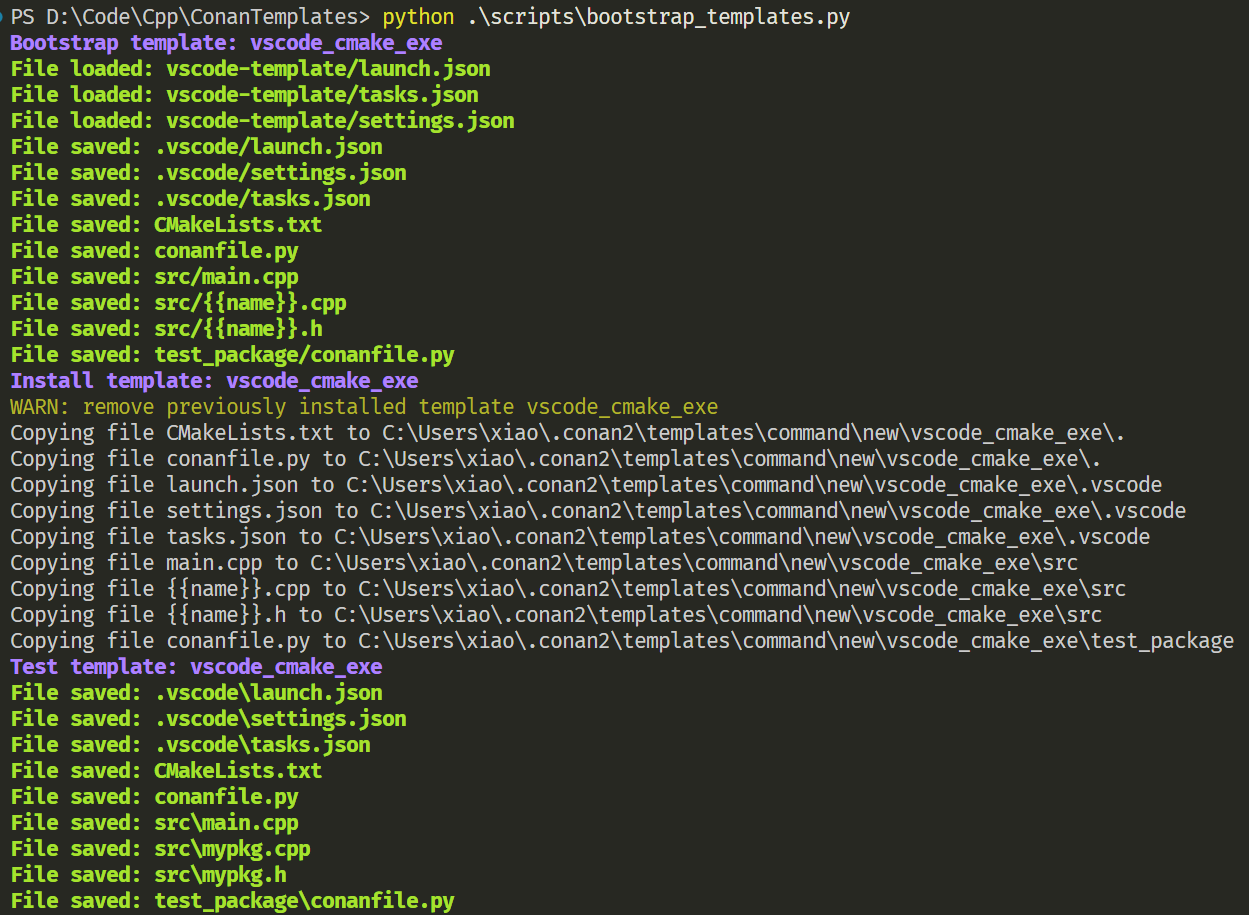
个人也整理了一个自用的 VS Code CMake Conan 模板,并基于 Conan API 实现自动安装到 Conan 的模版路径。
下载模板仓库后,使用命令
python scripts/bootstrap_templates.py 就可以自动创建 VS
Code 模板并将模板拷贝到 Conan 用户目录下。